 Skip to content


The Detail Guys MD · Maryland homeowner guide
Front yard landscaping ideas with rocks and mulch
A practical guide to rock borders and planted beds.
Quick answer
The best front yard landscaping ideas with rocks and mulch give each material a specific job. Use rock where a defined strip or visible border helps, and use organic mulch around plants where you want to refresh the bed over time. Plan how the two materials meet before ordering either one.
Plan view of a stone-edged bed
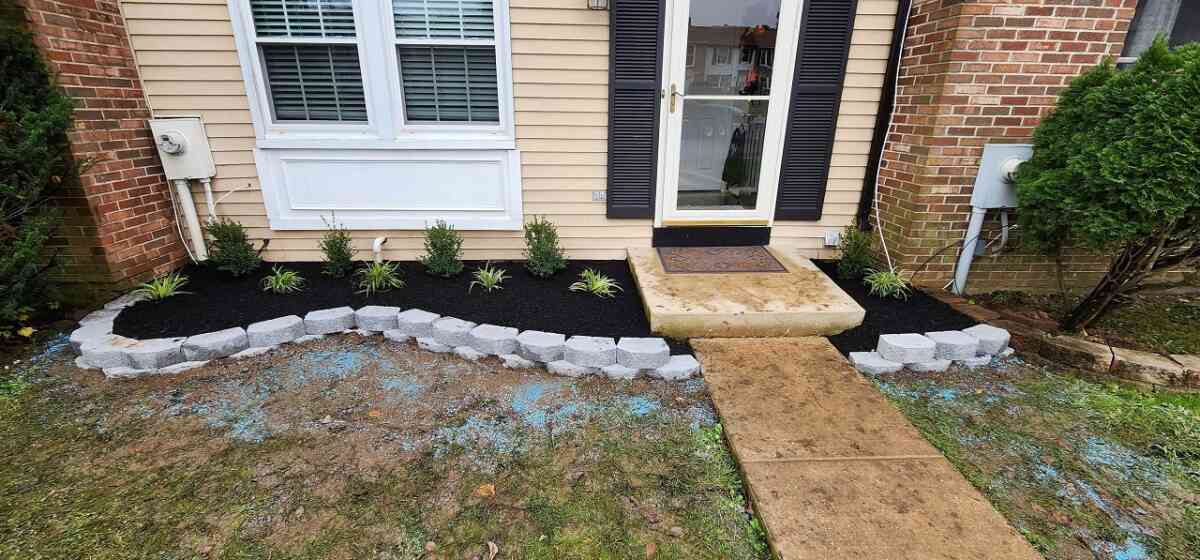
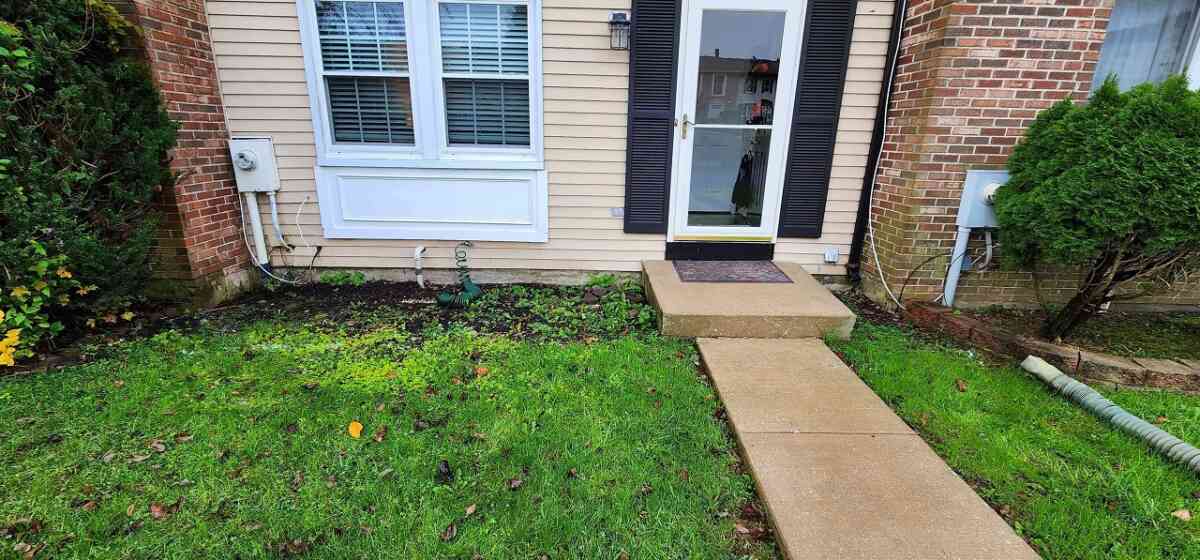
Before and after the stone border
Assign rock and mulch separate zones
Draw the path, foundation, and planted area first. Use rock in a band that follows a real edge or route rather than scattering it wherever the bed looks bare. Observe runoff before deciding whether the band belongs there.
Choose where the contrast will help
Use stone to mark a line someone can read from the curb or entrance. A border works best where it follows a path, a bed, or a visible change in grade. Lay out a sample with the stone you plan to use. If the line looks busy from the street, simplify it before extending it. A planted area can remain visually calm if the rock is concentrated in one strip instead of scattered through several beds.
Plan how the border meets the bed
Check the height of the bed relative to the walk. If the soil slopes across the edge, set a short test section and watch it after watering. Ask yourself whether a rake can move through the stone, whether mulch pieces get caught between the rocks, and whether a mower can pass without hitting the border. Leave enough separation to maintain each material with the tools you actually use.

Design the edge you will maintain
Mock up a short run with the actual rock and mulch. Check that both materials stay in their intended zones and that you can remove leaves from the stone. At a walk, keep loose pieces off the walking surface. The Federal Highway Administration explains how organic mulch limits evaporation and why rock should stay clear of seedling stems.
Read the before-and-after photos as a layout
In the project below, the front walk stays in place. The change is the introduction of a clearly defined planted edge on either side. Look at the transition between the stone, the mulch, and the walk. That is the detail to adapt. Your house may need a different border shape or material size if the bed runs downhill or if leaf cleanup is a regular chore.
Choose a rock detail you can repeat
If the bed is narrow, start with one continuous border and let the mulch fill the planted area behind it. If you want a wider rock band, give it a specific job such as defining a turn in the walkway. Try two arrangements on a short length using the real material. Rake leaves through each arrangement and step back to see how the two textures read from the house. Mark the places where you expect a mower or trimmer to pass.
Review the comparison photos for the boundary that changed, then sketch a version fitted to your own yard. Pay special attention to low points along the walk, the edge below a downspout, and the places where stones could creep into the grass. Keep a clear transition so you can refresh the mulch without repeatedly picking it out of the rock.
Compare edge types after deciding what the border needs to contain and how you will maintain it. Garden border options.
EPA WaterSense explains how to plan planting areas around water and maintenance needs.
| Detail | Works best at | Maintenance test |
|---|---|---|
| Low stone border | Defined bed beside a walk | Sweep the path without moving stone |
| Rock accent strip | A visible turn or change in grade | Remove leaves from the sample |
| Mulched planted bed | Around shrubs and seasonal plants | Taper cover clear of stems |
Find your next step
Choose the condition closest to what you see.
Compare projects by what changed
Look at the shape of the planting bed and the edge in each project photo. Decide whether you want the same boundary or just a similar color. Build around the slope and drainage at your house.
Pick one of two useful starting designs
For a narrow entry, test a continuous low rock line beside a simple planted bed. For a larger yard, try a broader bed with one stone accent and a separate, quieter edge. Sketch the borders and mark which parts will need regular cleanup. If the drawing calls for rock in several places, ask what job each patch performs. Remove patches with no clear purpose before you price the work.
Test a rock and mulch edge before extending it
- Lay a short sample beside the walkway and check the outline from both the street and the front door.
- Rake leaves through the test section to see where they collect and how much effort it takes to remove them.
- Water the bed and check the downhill end for pieces that shifted. Adjust the edge before repeating it across the front yard.
Keep planning
Common questions
Can I test the edge before installing it?
Yes. Mock up a short section with the actual materials. Try walking beside it and removing leaves from the stones. For a narrow entry, test a continuous low rock line beside a simple planted bed. For a larger yard, try a broader bed with one stone accent and a separate, quieter edge.
How do I keep the stone border from moving?
Test a defined border with a small section of both materials. Draw the path, foundation, and planted area first. Use rock in a band that follows a real edge or route rather than scattering it wherever the bed looks bare.
What if the planted bed only needs a refresh?
Choose organic cover suited to the planting and check existing depth. Mock up a short run with the actual rock and mulch. Check that both materials stay in their intended zones and that you can remove leaves from the stone.
What if runoff crosses the proposed rock strip?
Trace and address drainage before covering the area. Look at the shape of the planting bed and the edge in each project photo. Decide whether you want the same boundary or just a similar color. Build around the slope and drainage at your house.
Talk through your project
Tell The Detail Guys what you are working on and what you have found so far.